Sunday, April 6, 2014

Wooden Photo Transfer Stool Tutorial


So I decided to make a decorative stool for my sister's new place. The strange children on the stool are my niece and nephew and they are with my mother's terrified cat (joking he likes children...for breakfast). I hope you enjoy this video tutorial of this wooden photo transfer stool. Oh and if you re-create this I think it would be funny if the person in the picture looked like they were gonna be stepped on. I couldn't do that because my niece and nephew are children...boo! Please tag me on Instagram if you attempt this @lazyblueorchids
9b0acb28465eba09796ff4ef949cfe887143505f8a2c1f006a

Products Used
Mod Podge: Michaels
Gel Medium: Michaels
Sponge: Michaels
Chalkboard Paint: Home Depot
Paint Brush: Home Depot
Wooden Stool: AC Moore
Wash Cloth: You should have one in your home already lol

Saturday, March 22, 2014

Mini e.l.f. Haul and Review

So I recently needed new make-up but realized I may need money for that. After digging around in everyone's couch cushions...and also their wallets I finally came up with enough money to go on a mini shopping spree at e.l.f. (just kidding by the way...I got a job yo). e.l.f. is very affordable and also good quality make-up (e.l.f. stands for Eyes, Lips and Face just in case you didn't know). Here are somethings I bought and my review on them.

 Cream Eyeliner: $3.00
Pros: It comes in a cute container and also comes with a small brush which I like more than the longer brush.
Cons: Practice makes perfect. It takes some getting used to.
 Volume Plumping Mascara: $3.00
Pros: Has a huge brush which I love and the formula is OK.
Cons: It has a huge brush which isn't as functional on all areas of the eyes especially corners.

 Maximum Coverage Concealer (Almond): $3.00
Pros: It is oil free and also you get a lot for your money (FYI I may need a lighter concealer). It also covers well and dries matte.
Cons: Ehh I got nothing.
 Pressed Power (Almond): $3.00
Pros: I love this stuff!!! If you don't like using heavy foundations or you don't like any BB creams I would suggest this. It gives me enough coverage while not feeling like I have make-up on.
Cons: It goes on better with a make-up brush. The sponge it comes with is useless...to me.
 Small Smudge Brush: $3.00 Small Angled Brush $3.00 Eyeshadow C Brush: $3.00
Pros: They are very soft.
Cons: The Small Angled Brush is a little too soft especially to use with cream eyeliner.

 Endless Eyes Pro Mini Eyeshadow Palette Limited Edition-Everyday: $6.00
Pro: I love that it has a lot of neutral colors while adding a few bright ones which are great for the spring. It is also mixed with matte and shimmer eyeshadows so you get the best of both worlds.
Cons: It doesn't come with a useful brush.
Don't forget to check out my Youtube Channel. I will be posting a video for a wooden photo transfer tutorial on Tuesday. Youtube Channel Link

Bye :)

Monday, January 13, 2014

New Year New Face: DIY Facial

HAPPY NEW YEAR!!! So I woke up in 2014 with skin that should have been left in 2013 but some how it followed me.  After I curled up into a ball and ate ice cream and a bunch of different kinds of frozen appetizers from Trader Joes (I sometimes think they can count as a meal if I eat three different kinds) I decided to take action.  Action in the form of not really moving but searching Pinterest for the perfect facial. So here is what I came up with and I must say I'm loving it!!! Hope you enjoy!!!
What I Used
Baking Soda
Coconut Oil
Honey
Peroxide 
Milk(you can also use yogurt)

Honey Application
 Baking Soda Mix Application
Milk Application
 Directions
Step 1: Start off with a clean washed and dried face.
Step 2: Apply a thin layer of honey all over face except eyes. Keep this on for 5 to 10 minutes. FYI it will itch like crazy but stick it out.
Step 3: Wash face off with warm water then towel dry. Dab face with towel don't rub.
Step 4: Mix baking soda, peroxide and coconut oil together to form a paste.  About 3 tablespoons of baking soda and 1 to 2 tablespoons of peroxide and a 1/2 to 1 teaspoon of coconut oil. ( I didn't measure but if you have sensitive skin use less peroxide and more coconut oil and if you want a stronger facial use a little more peroxide.)
Step 5: Apply baking soda mixture all over face except eyes. Let it sit for about 1 minute then gently exfoliate with a face brush or even an unused toothbrush for about 1 to 2 minutes.
Step 6: Wash face with warm water and then towel dry.
Step 7: Apply a thin layer of cold milk all over face except eyes. Allow to dry. Once your face feels tight then leave on for 10 minutes.
Step 8: Wash face with cold water then towel dry.
WARNING: Your face will be red throughout this facial but after everything is completed the redness will go away anywhere form 30 minutes to an hour.
*I do this facial either once every 2 weeks or even once a month. In between this time I do mini facials once a week where I just put honey on my face for 10 minutes then I wash it off.*
Bye :)

Thursday, December 5, 2013

Holiday Sparkle Nail Art: Nail Stamping

Tis' the season to be festive...and jolly...and broke...and thankful ;).  So why not do it in style? I like to have fancy nails when I nervously swipe my credit card during the holidays, just in case it's declined I'm atleast fancy as I cover my face and run away. I hope you enjoy!!! Hashtag your holiday nails on Instagram at #lazyblueorchids.
What I Used
Wet N Wild: Clear Nail Protector (401A) Top Coat
KleanColor: Pink Sleepers (67) Base Coat
KleanColor: White (4)
SinfulColors: All About You (921)
Essie: Leading Lady (815)
Nail Brushes
Tweezers
Bundle Monster Stamp (Plate #323)
Directions
Step 1: Start off with a base coat to protect your nails. KleanColor: Pink Sleepers (67) Base Coat
Step 2: Paint your accent nail with two coats of SinfulColors: All About You (921) and the rest of your nails with two coats of Essie: Leading Lady (815)
Step 3: Using Bundle Monster stamping plate 323 and a Konad Stamper, stamp three of your nails with the snowflake design. (For more directions on stamping check out my Breast Cancer Awareness Nail Art Post. Or check out some videos on Youtube). KleanColor: White (4)
Step 4: Add golden center to the snowflakes using small nail brush or dotting tool and SinfulColors: All About You (921).
Step 5: Apply clear top coat to the fourth red nail without the snowflake design.  Add a gold diamond using your tweezers while polish is still wet. Press gently into nail. Wet N Wild: Clear Nail Protector (401A) Top Coat
Step 6: Apply clear top coat to the rest of your nails. Wet N Wild: Clear Nail Protector (401A) Top Coat
Step 7: Clean off the edges of your nails with a nail brush and 100% Acetone.
Step 8: Have a great Holiday Season.
Bye :)

Wednesday, November 27, 2013

Lipstick/Lip-liner Lookbook

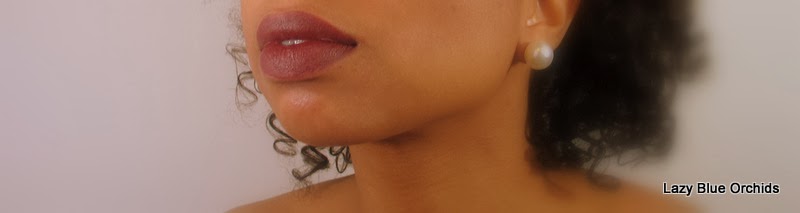
Accessories are no longer only jewelry, purses and hats but also what you put on your lips are just as important.  There are many brands making affordable high quality lipsticks but lip liners will always be the cheapest. Here are some of my favorite affordable fall lip colors (including an expensive lipstick that I adore...I couldn't leave it out). I hope you enjoy.

 NYC Brown Lip liner- $1.00 (All the information rubbed off so I don't know the actual color) 
Jordana Quick Liner-Ruby Stone (08) $1.29

Jordana Quick Liner-Mauvy (12) $1.29

Jordana Quick Liner-Raisin (13) $1.29

e.l.f. Matte Lip Color-Praline $3.00

Make Up For Ever-Rouge Artist Intense (Mat 8)

 Bye :)